Do you want to start the school year on the right foot and have everything working for you so you can focus solely on teaching? We have the solution for you.
As the school year begins, we bring you a collection of the best tips and tricks to get the most out of Additio App. Whether you’re new to the community or have been with us for a while, these tips will surely help you!
And don’t hesitate to share your own tips with us to take full advantage of Additio App!

Choose the plan that best suits your teaching needs
Starting from the beginning, the first thing you’ll need to do (especially if you’re new to Additio App) is to choose which plan fits your teaching needs best.
In short:
- Additio for Teachers: If you want unlimited access to all the teacher’s features, this is your plan. For €11.99 per year (less than what a paper notebook would cost), you’ll have access to all your favorite features without limitations.
- Additio for Schools: A license designed for educational centers that want to share data, collaborate, and access exclusive features (such as enrollments, official documentation, communication with families and students, report cards, etc.).
Do you know which plan to choose? Keep reading, because we’ve got more tricks to help you start the school year with Additio App.
To start the school year well: Organize your gradebook
Now that you’ve chosen a plan, it’s time to organize your notebook for the new school year, especially if you’ve been using Additio App for previous years.
You’ve probably opened your account after the summer break and noticed that you still have last year’s groups, want to reorder the students, or have too many rubrics. With these quick tips, you’ll have everything sorted in 5 minutes and can focus on what truly matters: preparing for the new school year.
- Bothered by last year’s groups? Archive them or organize them into folders.
We know you might want to refer to the information from old groups in the future, so you need access to them without losing their data. But to avoid them getting in the way during evaluations for the new school year, you can either archive the groups or organize them into folders.
In this video tutorial, you’ll see how easy it is to archive groups in the cloud and organize them in folders.
- Too many rubrics in your account? Folders are your friends.
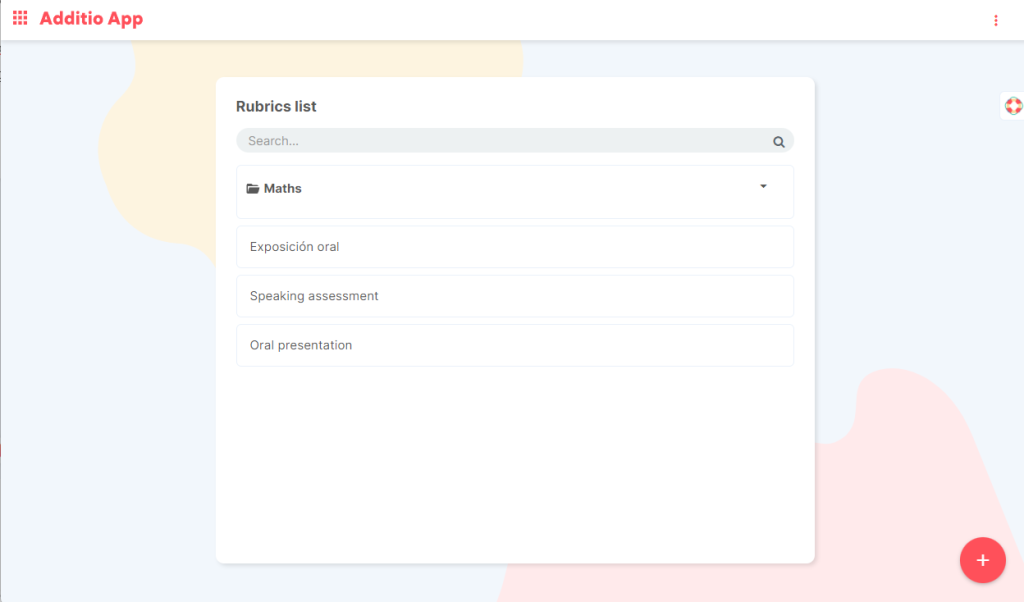
You might not have known this trick, but you can create folders within the rubrics section, allowing you to organize your rubrics into folders.
Simply hover over the “+” at the bottom right (don’t click yet!), and two options will appear, one of which is to create a folder.
To move rubrics into a folder, enter the rubric you want to move, click Actions > Edit Rubric, and scroll down to “Select folder.”
Another way to organize your rubrics is by using the option with three dots > Sort rubrics. This lets you drag and drop rubrics to order them as you like.
- Sort your students alphabetically and choose how to display their names.
Finally, a tip to help you organize the new school year. If you want to sort your students alphabetically, it’s very easy, and it’s done automatically. Simply enter a group, click the three dots, and select the last option, which is “Sort/Show.” If you click “Sort items,” you’ll see the option to sort students. To sort them alphabetically, choose “A-Z” or “Z-A.” And that’s it!
Another common question we get is whether you can display students by First Name + Last Name, instead of Last Name + First Name. The answer is yes, you can 🙂 Just go to gradebook settings, and under “Students,” choose what you prefer in the “Show students as…” option.
Prepare your evaluation gradebook
Now that last year’s data is all organized, the next step to starting the year on the right foot is preparing your evaluation notebook to make sure it’s ready for the upcoming school year. How can you do it? Follow these tips:
- Choose the evaluation structure you’re going to use:
When creating a new group, you’ll see that you can customize the notebook your way by deciding how to organize it. Keep in mind that each tab is a page in the notebook, and each column represents an activity/exercise/task/presentation. You can organize it in whatever way you prefer.
- Review the evaluation types you’re going to use:
When you sign up for Additio App, some default evaluation types come set up that suit most teachers. However, these are 100% customizable so you can adjust them to your preferences.
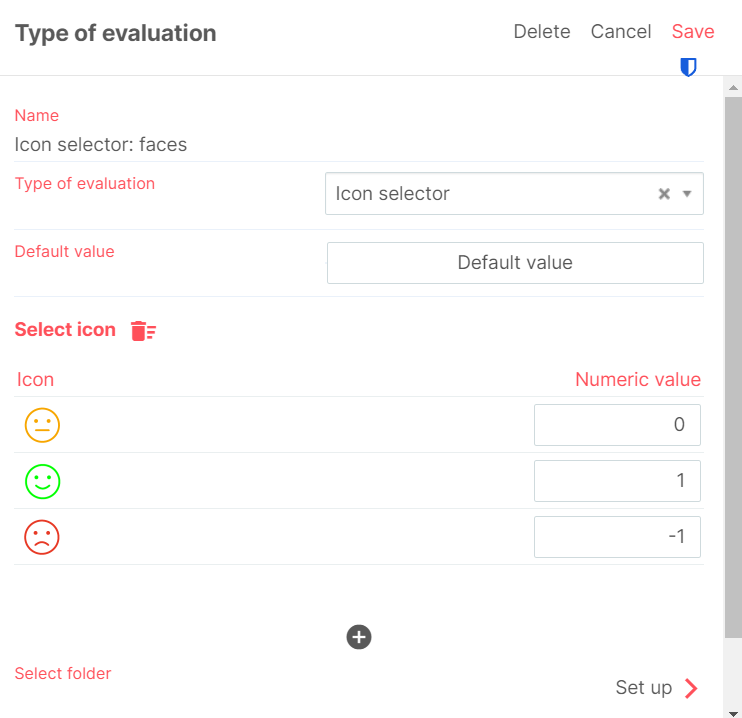
If you go to Menu > Assessment Tools > Type of evaluation, you’ll see that you can edit all the available evaluation types, and even create new ones to suit your teaching needs.
For example, you can change the value of the smiley faces icons, adjust the grading scales from Insufficient to Outstanding, or whatever else you need!
Are you all set for the start of the school year?
With the tips we’ve shared in this post, you now have everything you need to start the school year on the right foot. From Additio App, we wish you a successful start to the year and invite you to follow us on social media to stay up to date with all our news: Facebook, Twitter, Instagram and Youtube.
Happy start of the school year!