Working with well-ordered and organised information is key to optimise our work and the time we dedicate to it. That is why today we want to show you 5 tips to keep your notebook organised and make the student assessment process easier for you.
1.DIVIDING EACH TERM INTO TABS
Each term we create different activities and it is important to order them in order to be able to distinguish each of them in order to make calculations and formulas for the final evaluation.
In this case, we recommend the use of tabs to be able to include each term in one of them. In this way, we will have all the information in order and with a single click we will be able to easily find the activities of each term that we have done in class.
To do this, from Addito you can create a tab from the “tabs” option that appears at the top of the notebook. Just click on the + icon to create a new one and configure it with the name and subtitle you want to add.

2.ORGANISE COLUMNS INTO CATEGORIES
Another very practical and easy way to organise your notebook is by using categories. Organising your information by subject or content will help you to find a specific column.
When making final grades this will help you to create different subgroups, for example, exam grades, class activity grades, oral presentations, etc. In this way we will be able to have a much more accurate and detailed evaluation that will help students to understand the reason for their result.
How can we create them in Additio? Very simple! From your class group, when you create a new column you will see that in the section “type of grade” to establish which calculation to use in that column, there is a section “calculations” where you will find the option “category”, in this way, you will create a folder where you can add all the necessary columns and the system will take care of calculating the grade for you. Easy, isn’t it?

3.APPLY COLOURS TO COLUMNS
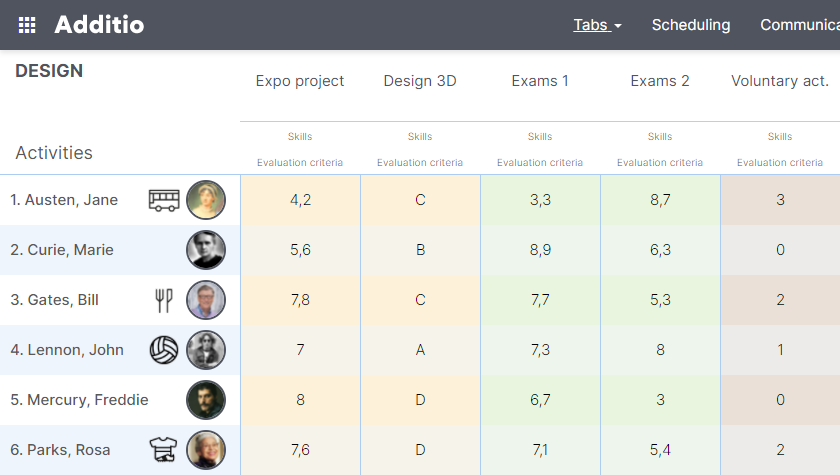
If you are interested in an option that is more visual to the eye, you can always apply a bit of colour to your notebook and make it more eye-catching.
In this case, one idea we give you is to apply colours according to the type of content. For example, all those columns that contain exam notes, you can put them in red, all those with activities done in class, in green, etc. This will make it quicker to access a specific note.
Remember that you can also apply conditional colours to the grades to make it easier to find the failing grades, those grades that are fairer, etc. It all depends on how you prefer to organise it. You will find this option in the same column where you have created the activity, in the configuration options.

4.ADD ICONS TO STUDENTS
A very easy way to identify your students is through the use of icons. Sometimes we find that we need to remember certain aspects of their life, such as extracurricular activities, allergies, attitudes, etc.
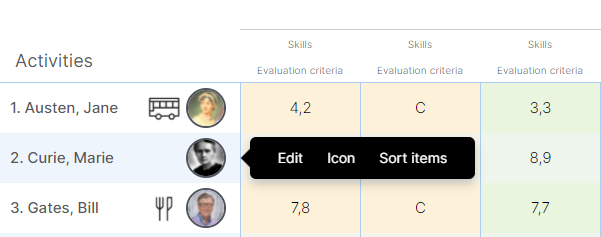
Adding an icon next to the student’s name will allow us, at a glance, to quickly identify who they are and at the same time remember what is going on. To do this, just click on the name with the right mouse button and select the icon option. Within this menu you will find thousands of options to use.

5.ORGANIZE COURSES IN FOLDERS
We often find that we work with more than one educational level and it can be tedious to find a particular group in the whole list. The best thing to do in this case is to organise the courses by folders, so that you can easily find the 1st year groups, the 2nd year groups, etc.
Go to the “assessment and groups” section of the main menu and click on the + icon at the bottom with the right mouse button. You will see a menu with different options, one of which is “create new folder”.
In order to add the groups that we have already created within the folders, you only have to click on the three dots > edit > click on one of the groups and in the menu that will open you will only have to click on the option “select folder” and choose the one you want to add it to.


